- Generating Images with ComfyUI and Z Image Turbo
- Automating Workflows with n8n and Local LLMs
- Local LLM Coding with VSCode and Qwen3-Coder
- Running and Serving LLMs with LM Studio
- Running LLMs on PyTorch with AMD ROCm™ Software
- Building Custom GPU Kernels with PyTorch and AMD ROCm™
- Building Your First Agent with GAIA
- Chatting with LLMs in Open WebUI
- Clustering Two Ryzen™ AI Halos with RCCL
- Clustering Two Ryzen™ AI Halos with RPC
- Fine-Tuning LLMs with LLaMA Factory
- Fine-Tuning LLMs with PyTorch and AMD ROCm™ Software
- Fine-Tuning LLMs with Unsloth
- Getting Started with Lemonade
- Getting Started with Ollama
- Getting Started with vLLM
- Local Computer Vision with AMD Ryzen™ AI NPU
- Real-Time Speech-to-Speech Translation
- Remote Development with AMD Sync
- Running DeepSeek V4 Flash with ds4
- Running Hermes Agent Locally with Lemonade Server
- Running OpenClaw Locally with Lemonade Server
Running and Serving LLMs with LM Studio
Set up LM Studio and LM Studio Server to run and serve large language models locally.
Overview
LM Studio is a powerful GUI-based wrapper for llama.cpp and also provides an OpenAI compliant endpoint for local model serving. LM Studio provides a simple but powerful interface to easily download and deploy models. LM Studio offers both Vulkan and AMD ROCm™ software backends (called runtimes) for AMD users.
What You’ll Learn
- How to configure and use LM Studio to leverage your local hardware
- Test and manage LLMs in a completely offline environment
- Serve models via OpenAI Compatible API to power custom workflows and apps
Setting the Memory Configuration
For the Ryzen AI Halo, the dedicated GPU memory defaults to 64GB, which is sufficient for most workloads. For larger models or longer contexts, increasing this to 96GB may help. To adjust, open AMD Software: Adrenalin Edition™ and navigate to Performance → Tuning → AMD Variable Graphics Memory. Reboot for the changes to take effect.
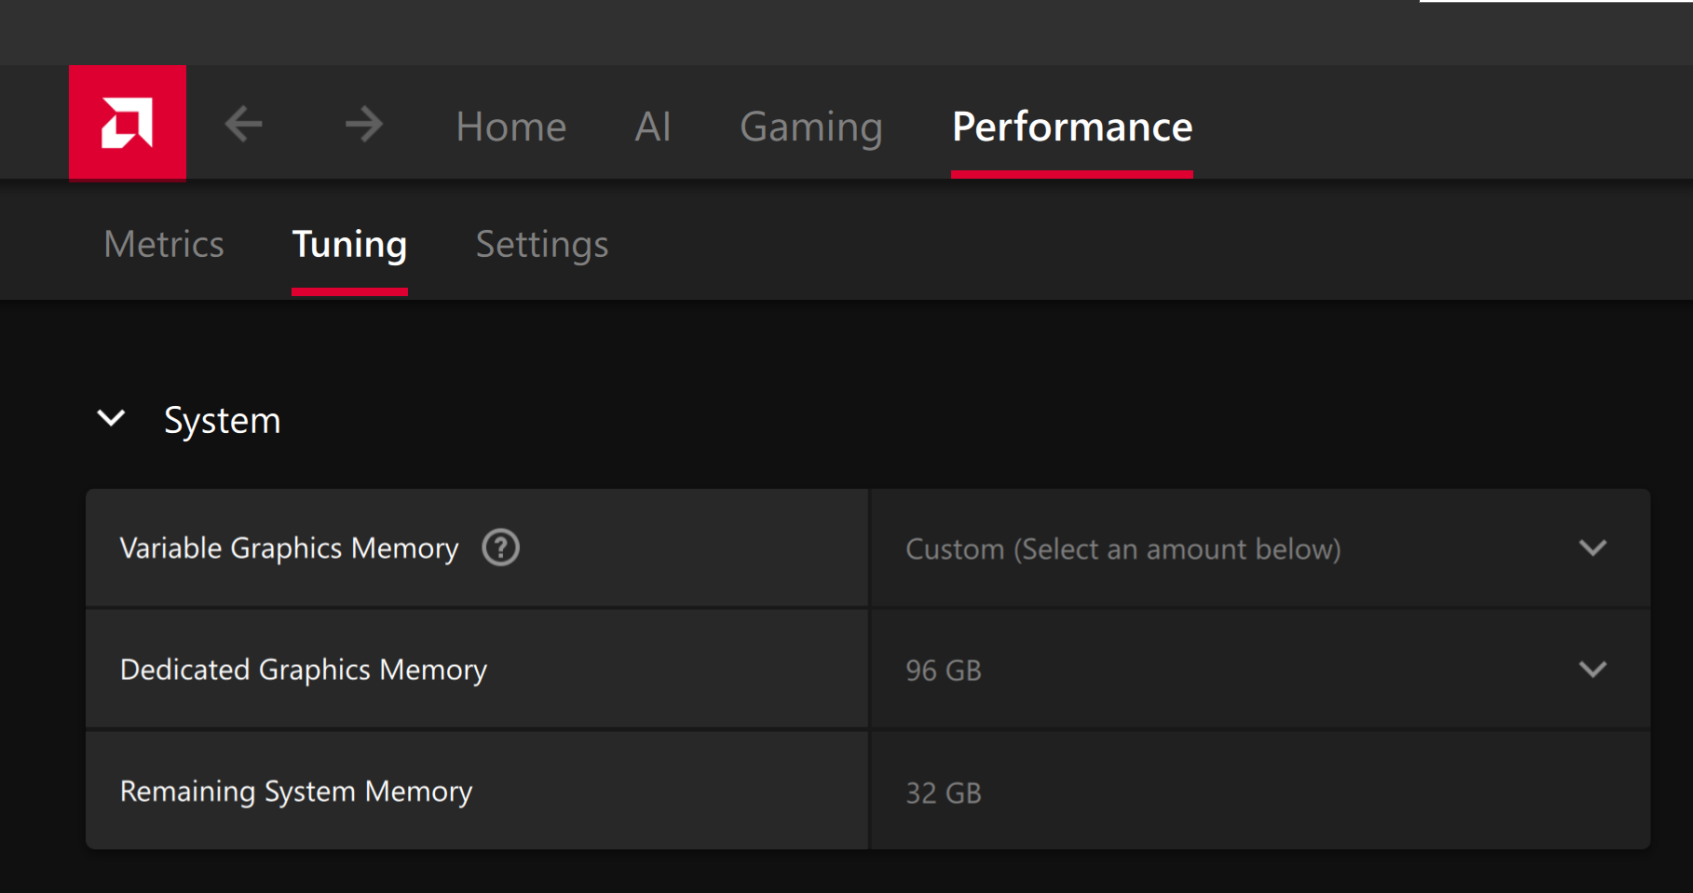
To change the dedicated GPU memory value, open AMD Software: Adrenalin Edition™ and navigate to Performance → Tuning → AMD Variable Graphics Memory. Reboot for the changes to take effect.
On Linux, to run larger models, increase the shared memory pool available to the GPU. This might involve setting the BIOS dedicated GPU memory to the minimum, so that the shared memory pool can be maximized.
For the AMD Ryzen™ AI Halo, the default is 96GB shared. To modify this, open the AMD Ryzen™ AI Developer Center and go to the Settings tab. Under Graphics Performance Settings, increase the Shared Video Memory slider, then click Apply Changes and reboot for the changes to take effect.
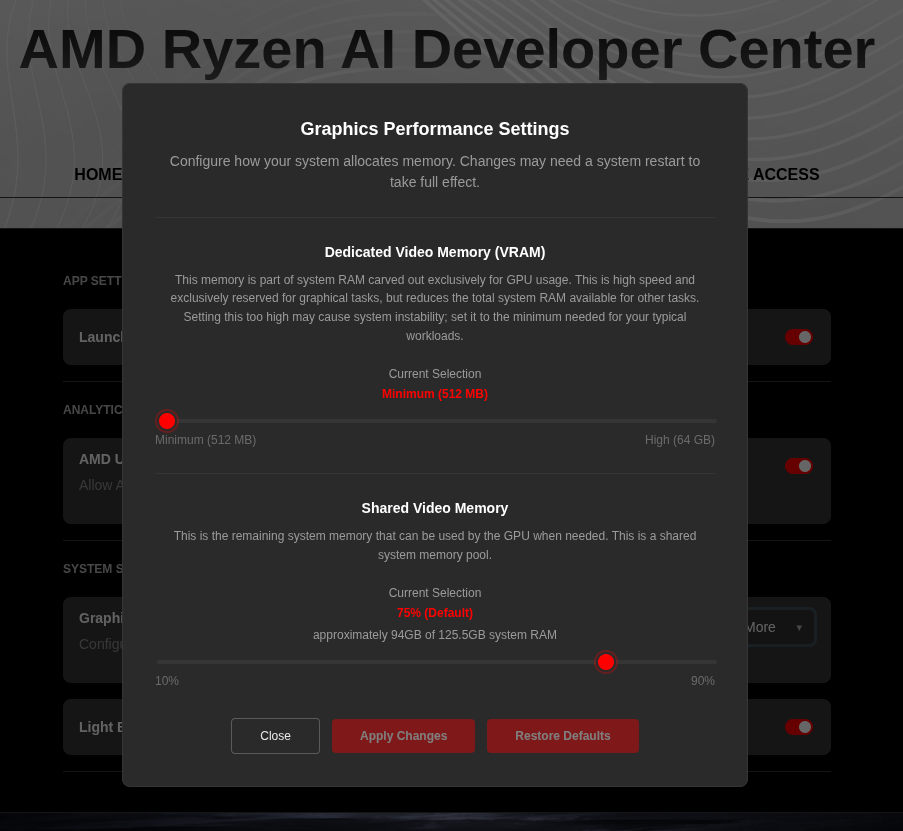
Increase the shared memory pool by changing the kernel’s Translation Table Manager (TTM) page setting. AMD recommends setting the minimum dedicated VRAM in the BIOS (0.5 GB) so the maximum amount is available as shared memory.
- Install the
pipxutility and add the path for pipx-installed wheels to the system search path:
sudo apt install pipxpipx ensurepath- Install the
amd-debug-toolswheel from PyPI:
pipx install amd-debug-tools- Query the current shared memory settings:
amd-ttm- Increase the shared memory allocation (units in GB):
amd-ttm --set <NUM>- Reboot for the changes to take effect.
Check for Software Updates
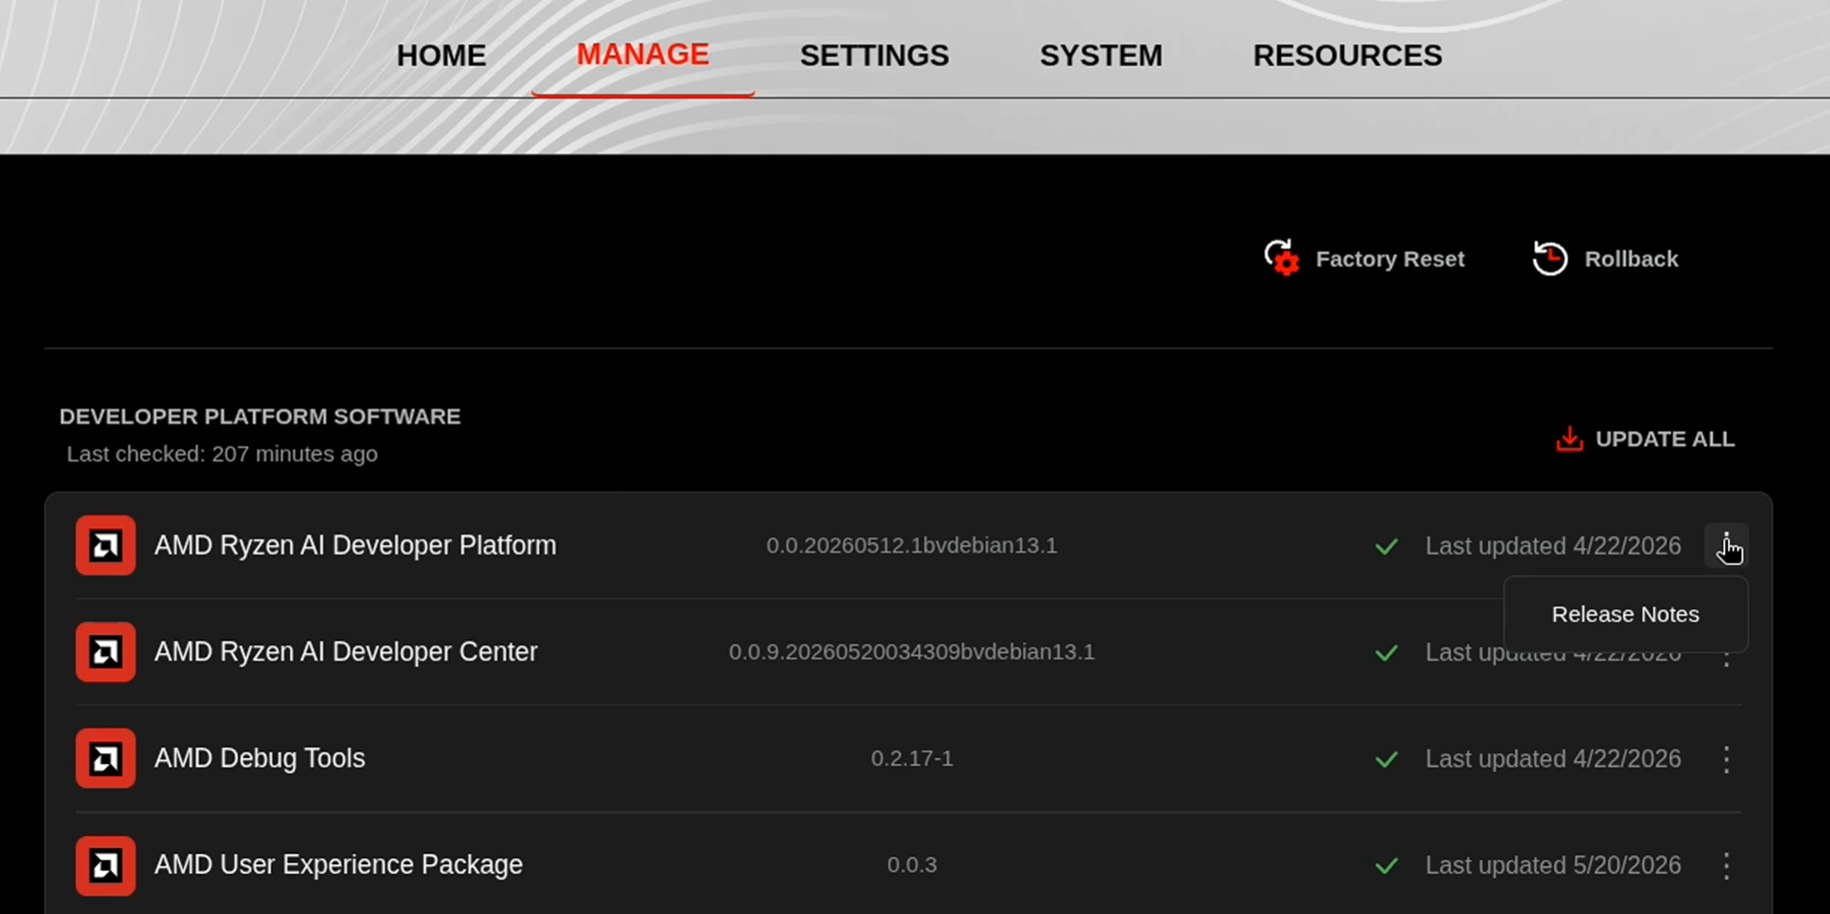
Before starting, ensure your Ryzen AI Halo has the latest software installed. Open the AMD Ryzen™ AI Developer Center and check for available updates, both to the app itself and additional software.
Go to the Updates tab. If updates are available, install them and reboot before continuing.
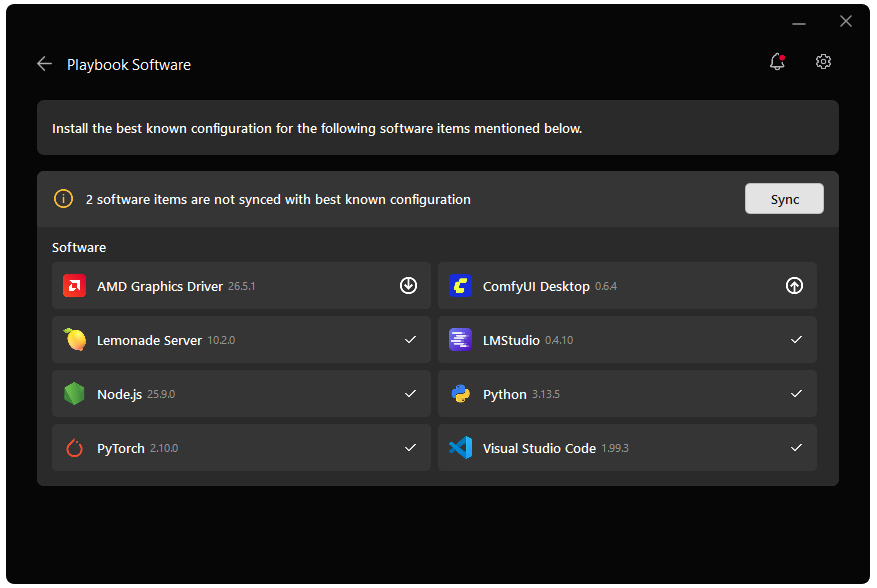
Go to the Manage tab. If updates are available, install them and reboot before continuing.
Installing Software Prerequisites
AMD GPU Driver
Update to the latest AMD GPU driver using AMD Software: Adrenalin Edition™.
- Open
AMD Software: Adrenalin Editionfrom your Start menu or system tray. - Navigate to Driver and Software, click Manage Updates.
- If an update is available, follow the prompts to download and install.
AMD GPU Driver
Install the AMD GPU Driver (amdgpu) using the Radeon Software for Linux (RSL) flow. For instructions for your distribution, see Install the kernel driver.
LM Studio
LM Studio can be installed from the AMD Ryzen™ AI Developer Center. Go to the Updates tab and install LM Studio if it is not already present.
To allow LM Studio to see the pre-installed models, navigate to Settings > General > Models Directory. Then change the path to C:\Users\Public\models
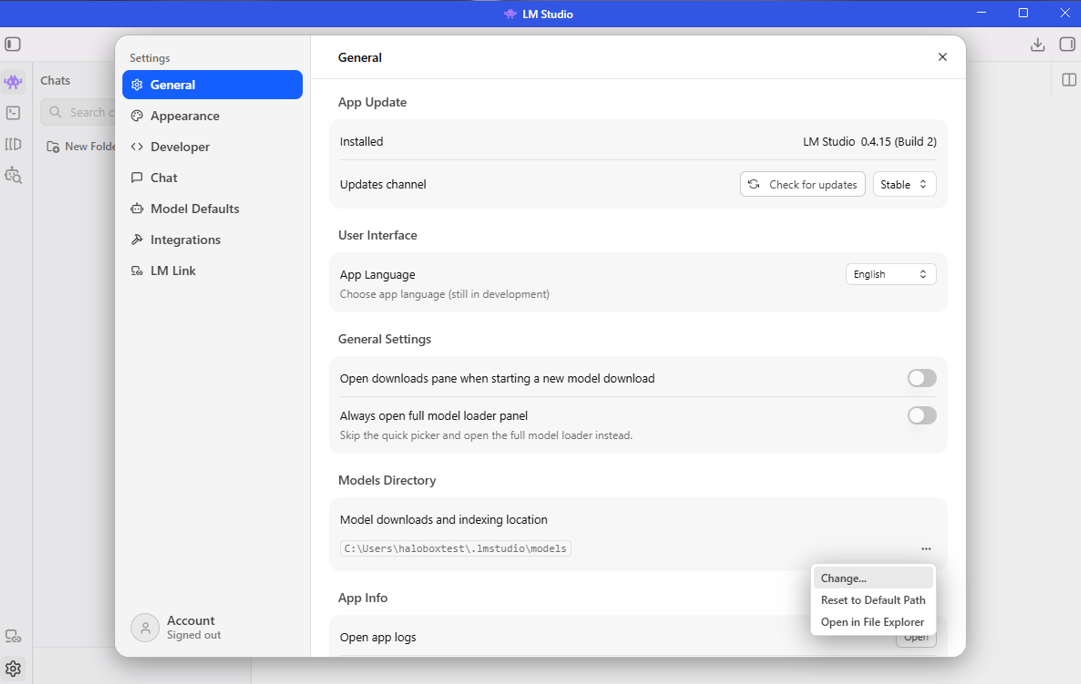
- Download the installer from here: https://lmstudio.ai/download
- Install.
- Download the appimage from here: https://lmstudio.ai/download?os=linux
- run
sudo apt install libfuse2 - run
cd ~/Downloads - run
chmod +x LM-Studio-*.AppImage - run
./LM-Studio-*.AppImage
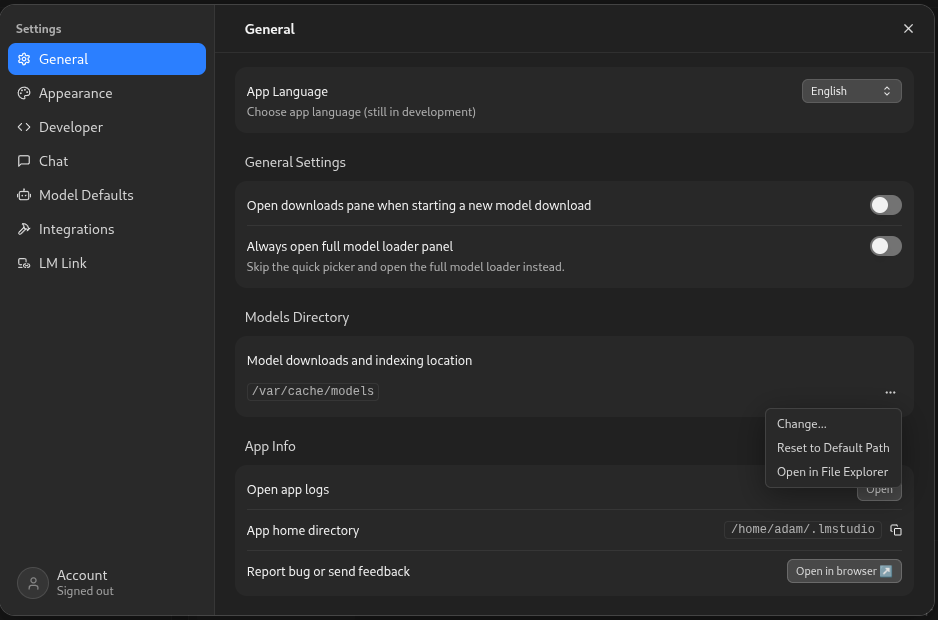
To allow LM Studio to see the pre-installed models, navigate to Settings > General > Models Directory. Then change the path to /var/cache/models.
Downloading Models
Downloading GPT-OSS 120B on LM Studio
To download the GPT-OSS 120B model:
- Press “Ctrl” + “Shift” + “M” on your keyboard or click on the “Discover” tab (Magnifying Glass icon) on the left sidebar
- Search for
ggml-org/gpt-oss-120b-GGUF - Select
mxfp4and click Download
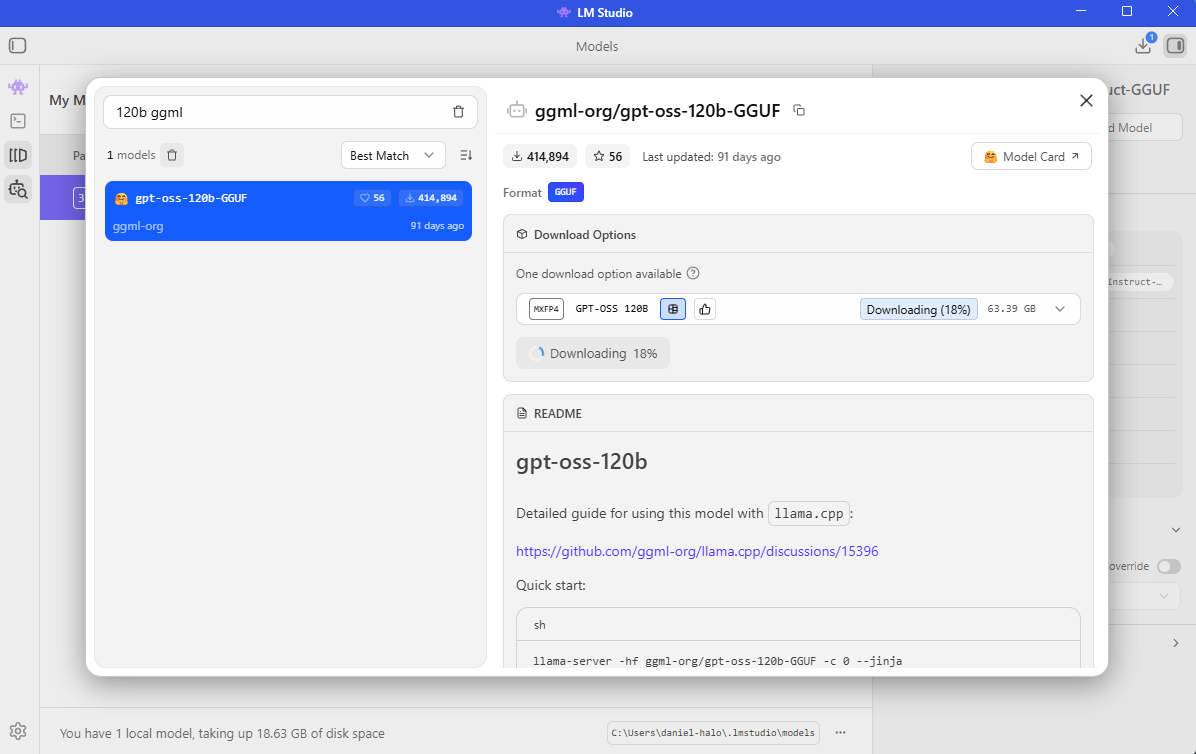
LM Studio will automatically download and place the model in the correct directory.
Should you wish to download additional models, you can search for them in the Discover tab and LM Studio will handle the rest.
Downloading Qwen3.5 9B on LM Studio
To download the Qwen3.5 9B model:
- Press “Ctrl” + “Shift” + “M” on your keyboard or click on the “Discover” tab (Magnifying Glass icon) on the left sidebar
- Search for
Qwen3.5 9B - Select a quantization (the recommended
Q4_K_Mis a good balance of size and quality) and click Download
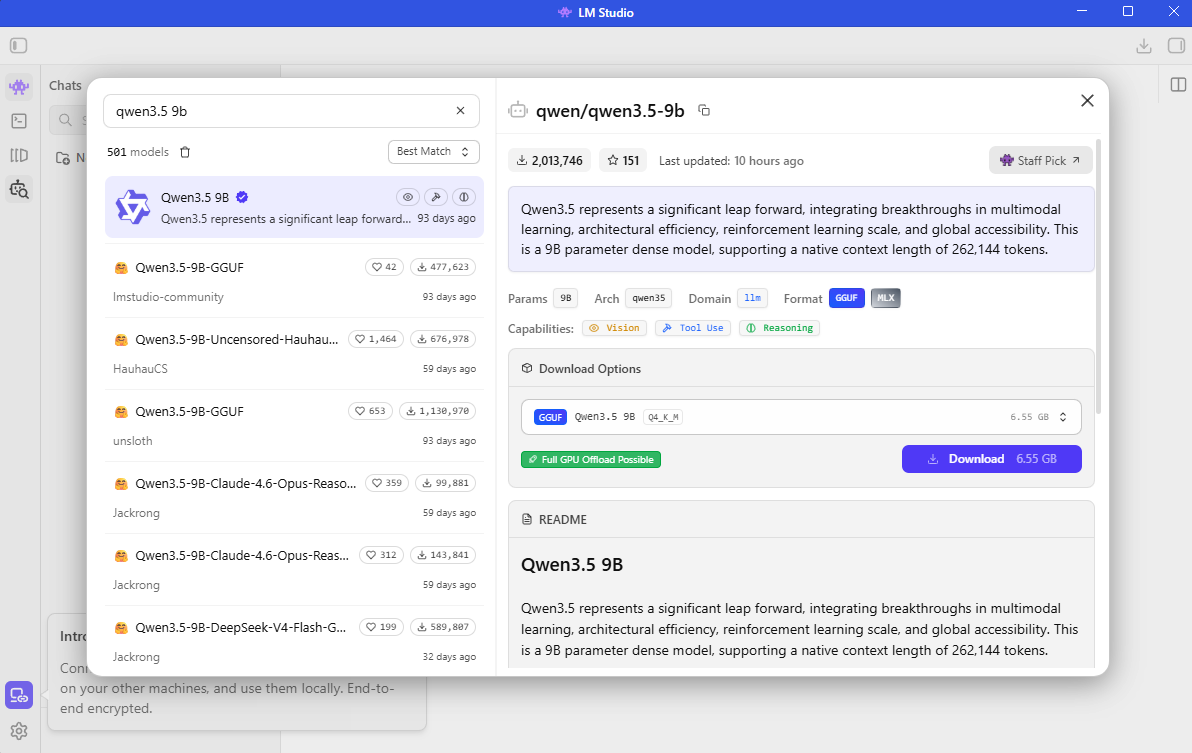
LM Studio will automatically download and place the model in the correct directory.
Should you wish to download additional models, you can search for them in the Discover tab and LM Studio will handle the rest.
Chatting with an LLM
Learn how to start chatting with a ChatGPT-grade LLM completely locally.
- Open LMStudio.
- Press
Ctrl + Lto open the Model Loader, selectManually choose model load parameters, and click on${model_name} - Make sure “show advanced settings” is checked.
- Change
Context Lengthas desired. Higher context length means more model memory, but more system memory used. Recommended for this playbook is 4096. - Make sure
GPU Offloadis set to maximum andFlash Attentionis On (Cache Quantizations can remain off) - Check
Remember settingsand click onLoad Model. - If not in the chat window, press
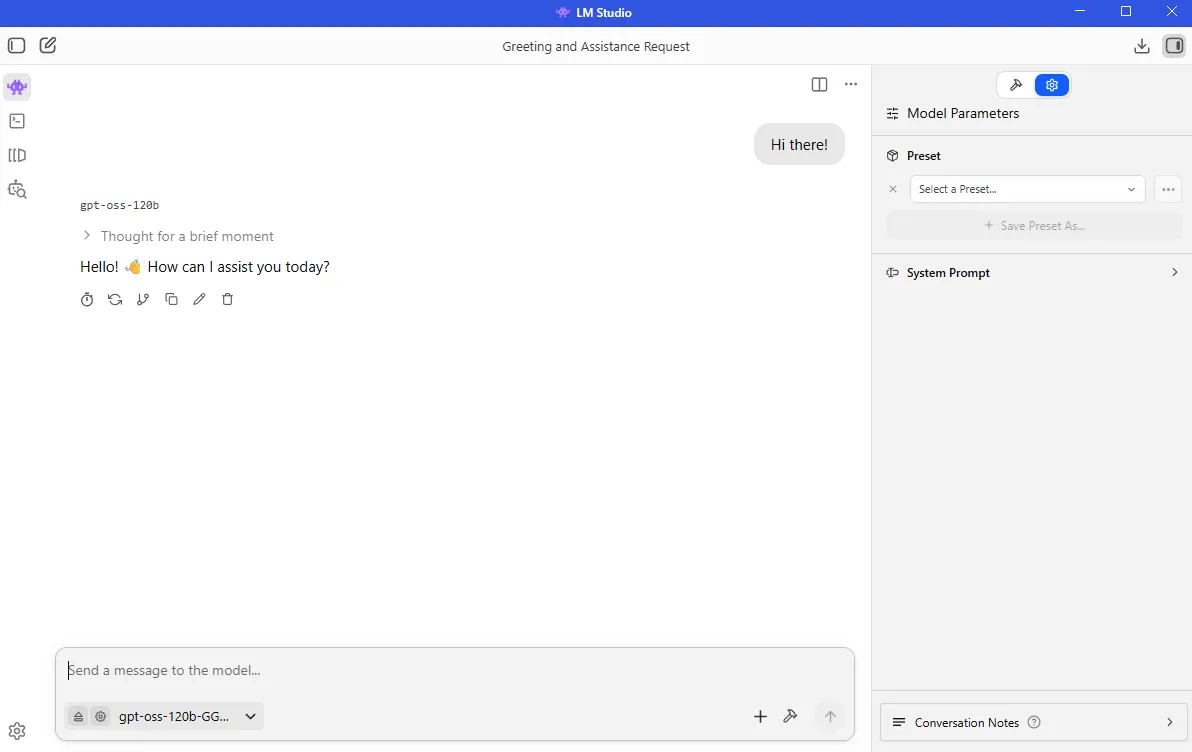
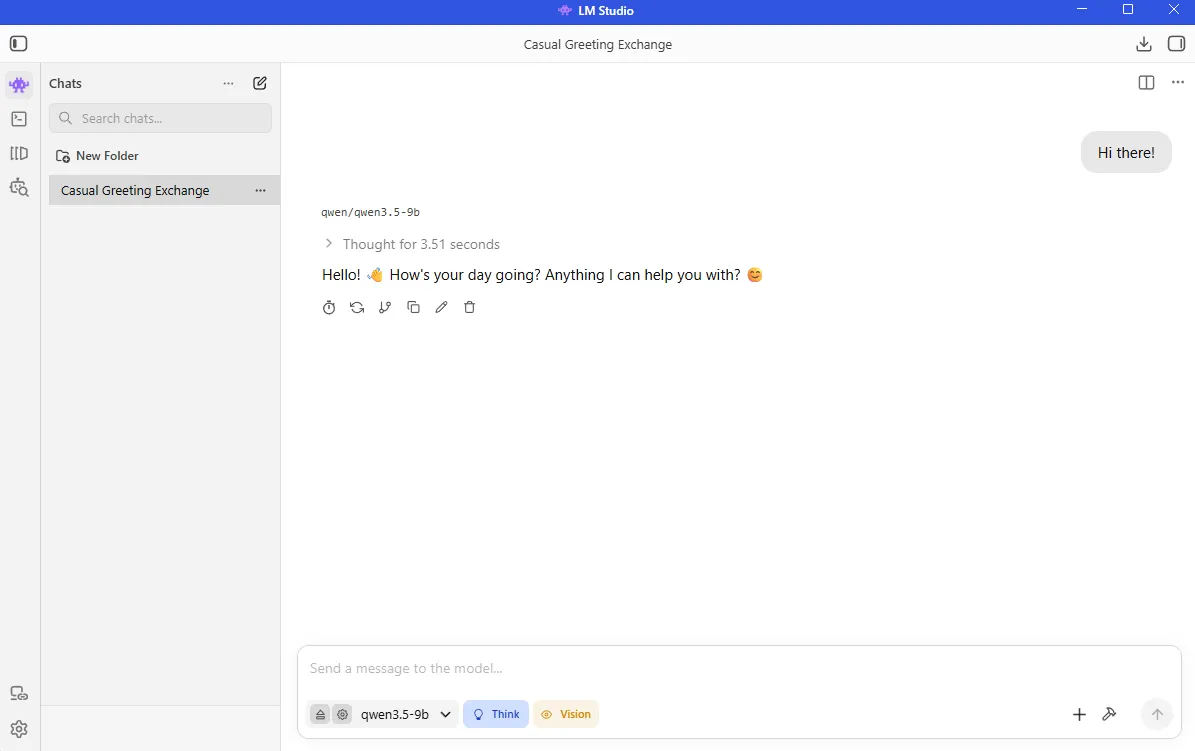
Ctrl + 1or click on the 👾 button on the top left of the screen. - Send a message and start interacting with the model!
Serve LLMs through an OpenAI compatible endpoint
LM Studio also offers an OpenAI compliant endpoint in the form of LM Studio Server. This has already been demonstrated in an agentic coding workflow with Cline here. Another common use case is connecting LM Studio Server to any web application (React, Node.js, Python) by sending standard HTTP requests to the inference endpoint.
To set up LM Studio Server, use the following instructions:
- On the left hand side, click on the
Developertab (command line icon) orCtrl + 2and then click onServer Settings. - (Optional): If you want to serve the model over your LAN, check
Serve on Local Network. If you want to use with a website or extensive calling within VS Code, checkEnable CORS. - On the upper left corner, make sure the server is running by clicking on the toggle button in front of
Status. - An OpenAI compliant endpoint will now be running. The address is typically at http://127.0.0.1:1234
- If a model is not already loaded, you can load it by clicking
Load Modeland following the previously mentioned steps.
This model will now be accessible through the LM Studio Server endpoint and will support OpenAI endpoints including:
| Endpoint | Method | Docs |
|---|---|---|
| /v1/models | GET | Models |
| /v1/responses | POST | Responses |
| /v1/chat/completions | POST | Chat Completions |
| /v1/embeddings | POST | Embeddings |
| /v1/completions | POST | Completions |
Example: Pinging your Endpoint
Having just created the OpenAI Compatible endpoint, let’s look at how to integrate this into a Python developer environment (such as VSCode) and use your system as a local API Provider.
- Create a Python virtual environment:
On Linux, open a terminal in the directory of your choice and follow the commands to create a venv.
sudo apt updatesudo apt install -y python3-venvpython3 -m venv lmstudio-env --system-site-packagessource lmstudio-env/bin/activateGrant your user access to GPU devices (log out and back in for this to take effect):
sudo usermod -aG render,video $LOGNAMEOn Linux, open a terminal in the directory of your choice and follow the commands to create a venv.sudo apt updatesudo apt install -y python3-venvpython3 -m venv lmstudio-envsource lmstudio-env/bin/activateOn Windows, open a terminal in the directory of your choice and follow the commands to create a venv.
python -m venv lmstudio-env --system-site-packageslmstudio-env\Scripts\activateOn Windows, open a terminal in the directory of your choice and follow the commands to create a venv.
python -m venv lmstudio-envlmstudio-env\Scripts\activate- Install the OpenAI package
pip install openai- Run the following script to ping the endpoint we have just created.
from openai import OpenAI
# Initialize the client specifically for your local server# The API key is required by the library but ignored by LM Studioclient = OpenAI(    base_url="http://localhost:1234/v1",    api_key="lm-studio")print("Attempting to connect to local LM Studio server...")
try:    # Create a simple chat completion request    completion = client.chat.completions.create(        model="local-model", # The model identifier is optional in local mode        messages=[            {"role": "system", "content": "You are a helpful coding assistant."},            {"role": "user", "content": "Explain Python decorators in 1 sentence"}        ],        temperature=0.7,    )    # Print the response    print("\nConnection Successful! Server Response:\n")    print(completion.choices[0].message.content)
except Exception as e:    print(f"\nConnection Failed: {e}. Ensure LM Studio server is running on port 1234.")
(Optional): Swapping between Runtimes
- Press
Ctrl + Shift + Ron your keyboard. Alternatively click on theDiscovertab (Magnifying Glass) on the left-hand side and then click onRuntimein the pop up. - You should then see
Runtime Selections, where the dropdown menu can be used to change the runtime.
Next Steps
- Custom App Integration: Integrate your own Python scripts or applications using the local OpenAI-compatible API.
- Advanced Frontends: Connect powerful interfaces like Open WebUI to your server for chat history and persona management.
For more documentation, please visit: https://lmstudio.ai/docs/developer
Need help with this playbook?
Run into an issue or have a question? Open a GitHub issue and our team will take a look.