- Generating Images with ComfyUI and Z Image Turbo
- Automating Workflows with n8n and Local LLMs
- Local LLM Coding with VSCode and Qwen3-Coder
- Running and Serving LLMs with LM Studio
- Running LLMs on PyTorch with AMD ROCm™ Software
- Building Custom GPU Kernels with PyTorch and AMD ROCm™
- Building Your First Agent with GAIA
- Chatting with LLMs in Open WebUI
- Clustering Two Ryzen™ AI Halos with RCCL
- Clustering Two Ryzen™ AI Halos with RPC
- Fine-Tuning LLMs with LLaMA Factory
- Fine-Tuning LLMs with PyTorch and AMD ROCm™ Software
- Fine-Tuning LLMs with Unsloth
- Getting Started with Lemonade
- Getting Started with Ollama
- Getting Started with vLLM
- Local Computer Vision with AMD Ryzen™ AI NPU
- Real-Time Speech-to-Speech Translation
- Remote Development with AMD Sync
- Running DeepSeek V4 Flash with ds4
- Running Hermes Agent Locally with Lemonade Server
- Running OpenClaw Locally with Lemonade Server
Getting Started with Ollama
Install Ollama and run LLMs locally — chat from the terminal, desktop app, or REST API.
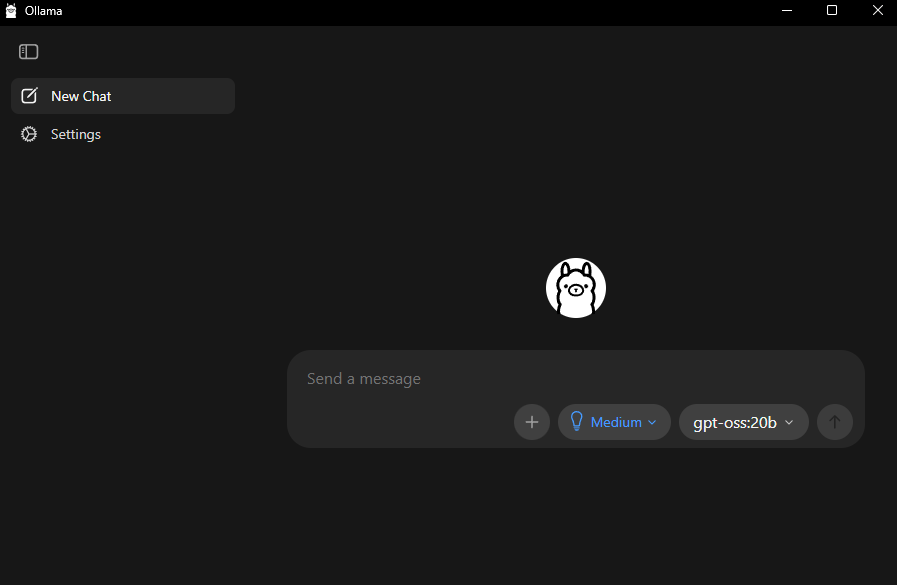
Overview
Ollama is a popular lightweight tool for running large language models locally. It handles model downloading, quantization, and serving behind a simple command-line interface and desktop app, so you can go from zero to chatting with an LLM in minutes.
This playbook walks you through installing Ollama, pulling the GPT-OSS 20B model, and having a conversation with it, through both the terminal and the desktop app.
What You’ll Learn
- How to install and launch Ollama on your system
- Pull and run the GPT-OSS 20B model locally
- Chat with models using the CLI
- Query models programmatically through the REST API
Setting the Memory Configuration
For the Ryzen AI Halo, the dedicated GPU memory defaults to 64GB, which is sufficient for most workloads. For larger models or longer contexts, increasing this to 96GB may help. To adjust, open AMD Software: Adrenalin Edition™ and navigate to Performance → Tuning → AMD Variable Graphics Memory. Reboot for the changes to take effect.
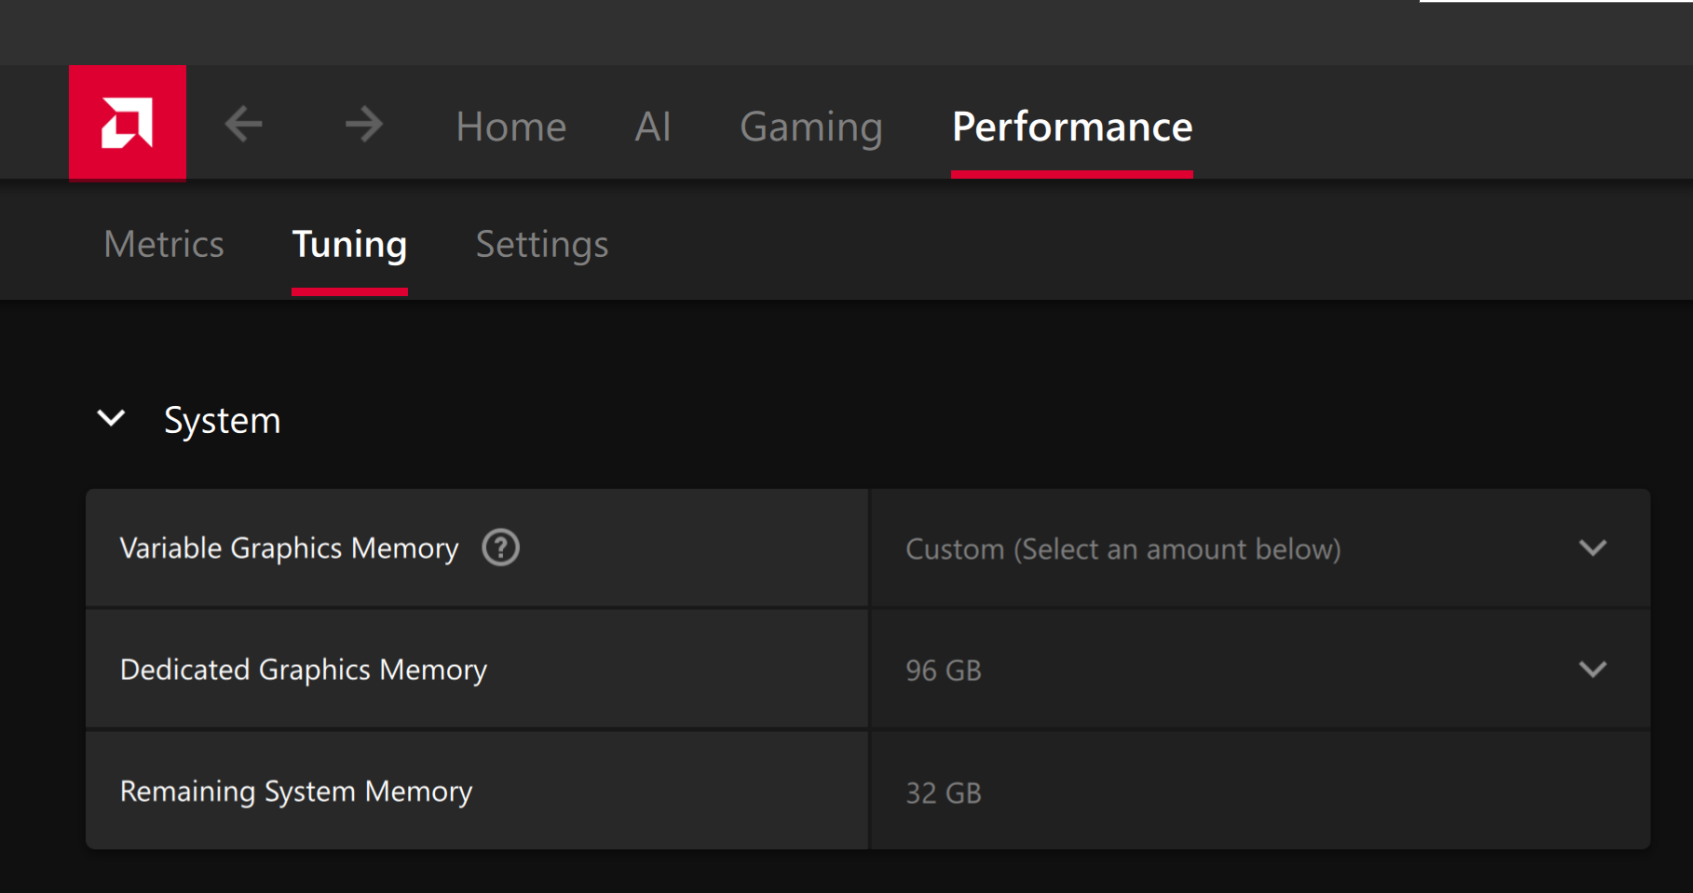
To change the dedicated GPU memory value, open AMD Software: Adrenalin Edition™ and navigate to Performance → Tuning → AMD Variable Graphics Memory. Reboot for the changes to take effect.
On Linux, to run larger models, increase the shared memory pool available to the GPU. This might involve setting the BIOS dedicated GPU memory to the minimum, so that the shared memory pool can be maximized.
For the AMD Ryzen™ AI Halo, the default is 96GB shared. To modify this, open the AMD Ryzen™ AI Developer Center and go to the Settings tab. Under Graphics Performance Settings, increase the Shared Video Memory slider, then click Apply Changes and reboot for the changes to take effect.
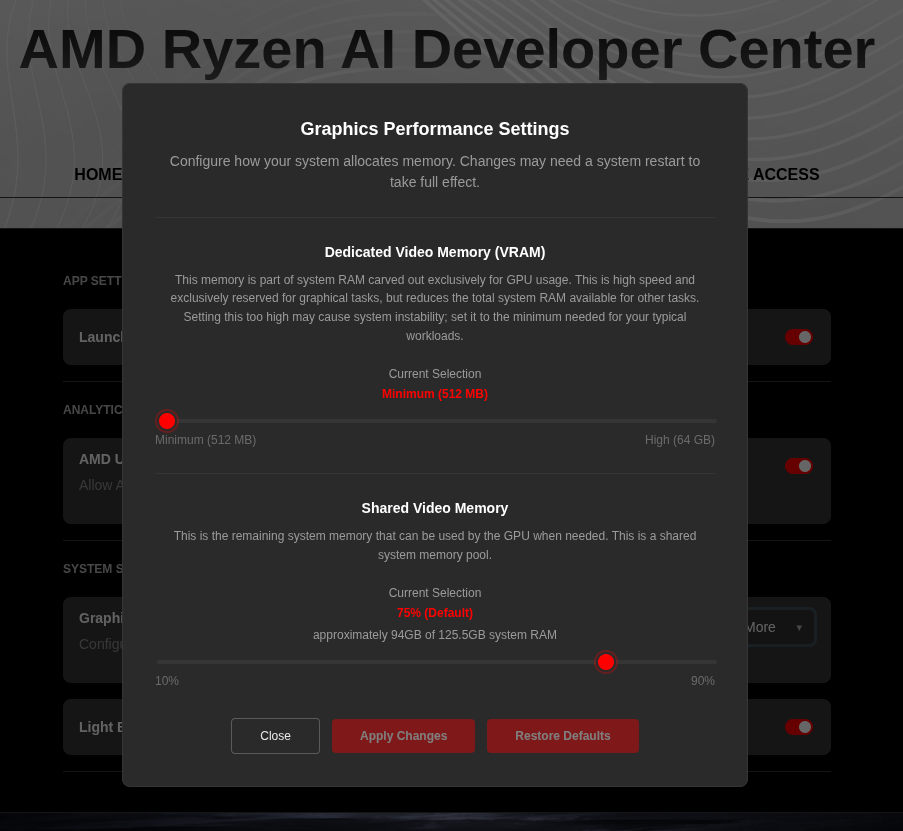
Increase the shared memory pool by changing the kernel’s Translation Table Manager (TTM) page setting. AMD recommends setting the minimum dedicated VRAM in the BIOS (0.5 GB) so the maximum amount is available as shared memory.
- Install the
pipxutility and add the path for pipx-installed wheels to the system search path:
sudo apt install pipxpipx ensurepath- Install the
amd-debug-toolswheel from PyPI:
pipx install amd-debug-tools- Query the current shared memory settings:
amd-ttm- Increase the shared memory allocation (units in GB):
amd-ttm --set <NUM>- Reboot for the changes to take effect.
Check for Software Updates
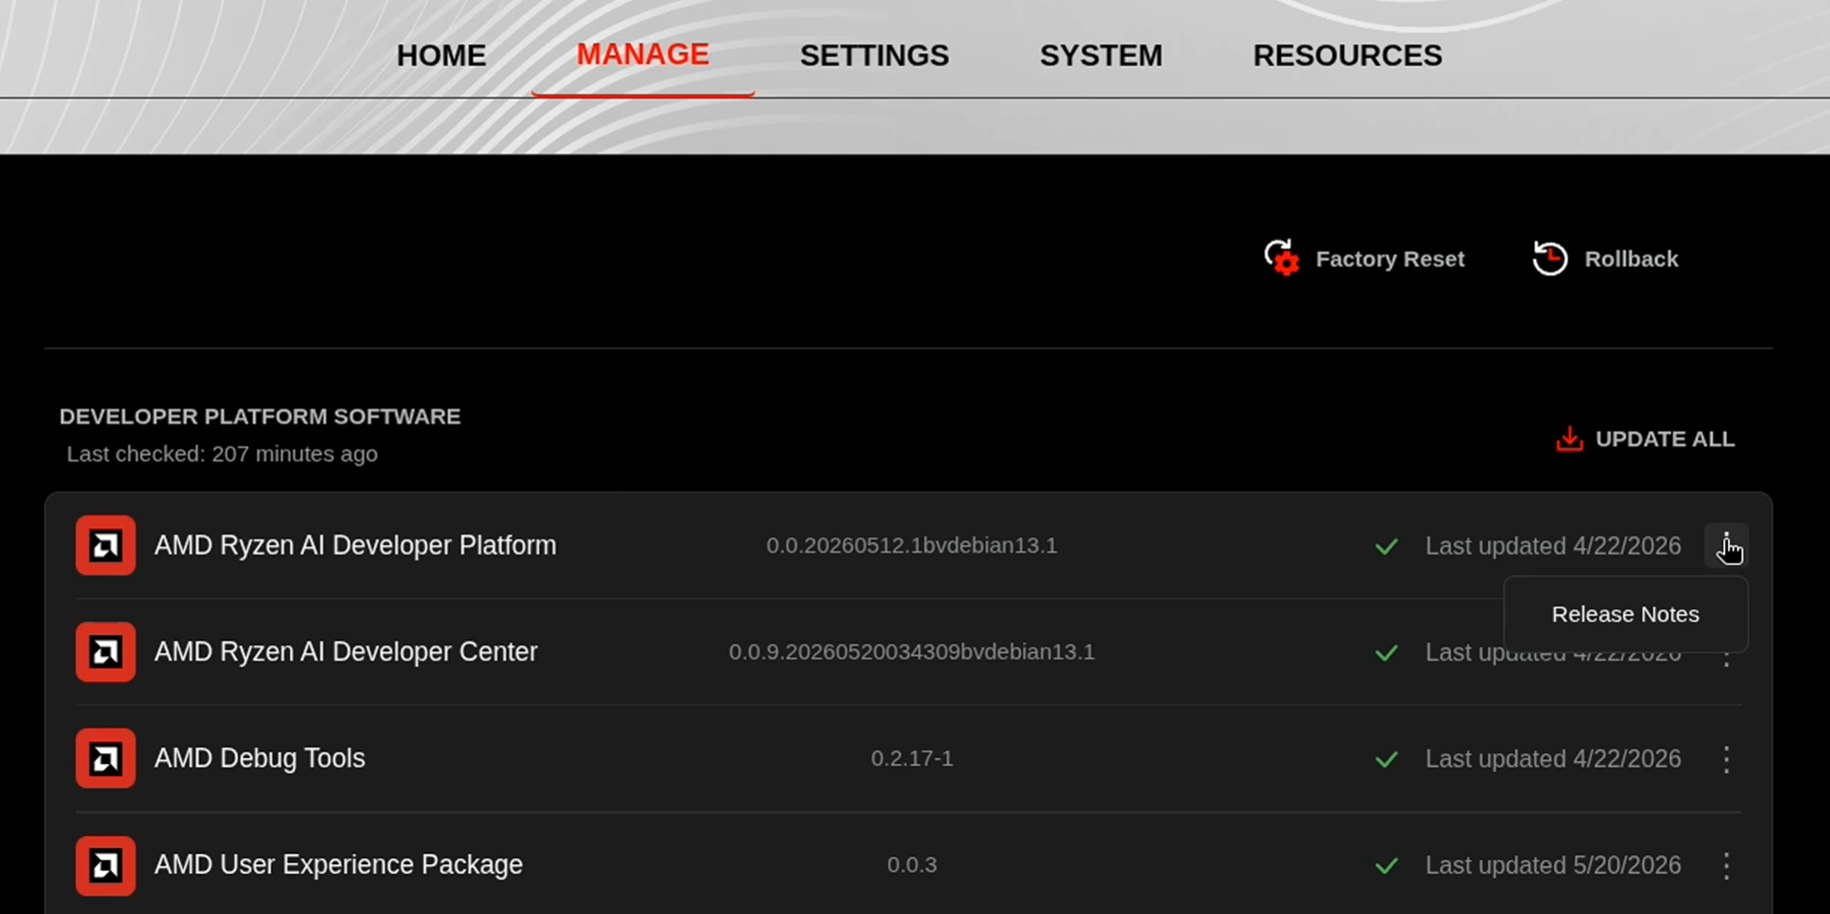
Before starting, ensure your Ryzen AI Halo has the latest software installed. Open the AMD Ryzen™ AI Developer Center and check for available updates, both to the app itself and additional software.
Go to the Updates tab. If updates are available, install them and reboot before continuing.
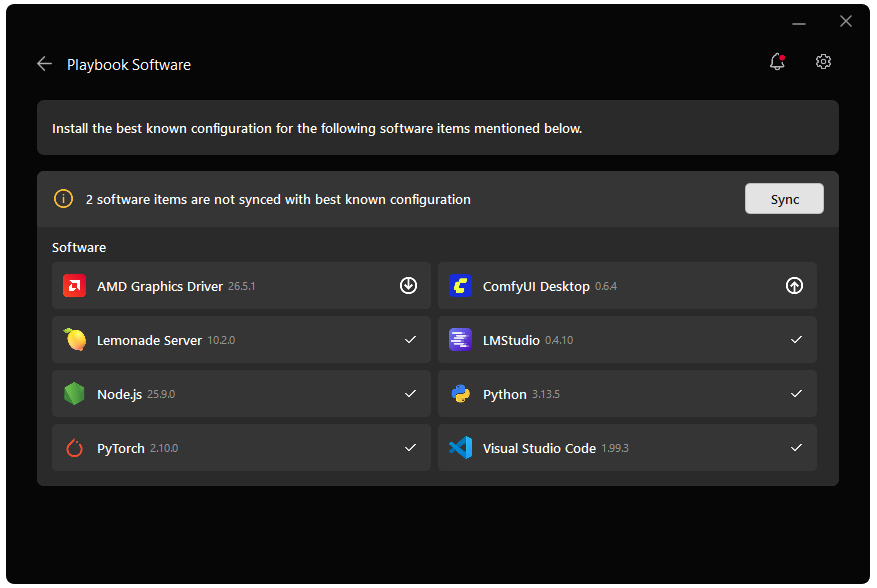
Go to the Manage tab. If updates are available, install them and reboot before continuing.
Installing Software Prerequisites
AMD GPU Driver
Update to the latest AMD GPU driver using AMD Software: Adrenalin Edition™.
- Open
AMD Software: Adrenalin Editionfrom your Start menu or system tray. - Navigate to Driver and Software, click Manage Updates.
- If an update is available, follow the prompts to download and install.
AMD GPU Driver
Install the AMD GPU Driver (amdgpu) using the Radeon Software for Linux (RSL) flow. For instructions for your distribution, see Install the kernel driver.
Installing Ollama
- Download the installer from ollama.com/download.
- Run the
.exeinstaller and follow the prompts. - Once installed, Ollama runs as a background service and is accessible from the terminal, desktop app, and system tray.
Verify the installation by opening a terminal and running:
ollama --versionYou should see the installed version number printed to the console.
Run the official install script:
curl -fsSL https://ollama.com/install.sh | shVerify the installation:
ollama --versionYou should see the installed version number printed to the console.
Pulling Your First Model
Ollama manages models through a registry similar to container images. To download GPT-OSS 20B:
ollama pull gpt-oss:20bThis downloads the model weights to your local machine (approximately 12 GB). The download only happens once, and subsequent runs load the model from disk.
You can confirm the model is available with:
ollama listYou should see gpt-oss:20b in the output along with its size and last-modified date.
Model Naming
Ollama model names follow the format name:tag. The tag usually indicates the parameter count or quantization variant. Some useful commands for managing models:
| Command | Description |
|---|---|
ollama list | Show all downloaded models |
ollama pull <model> | Download a model without running it |
ollama rm <model> | Remove a model to free disk space |
ollama show <model> | Display model metadata and parameters |
Chatting from the Terminal
Launch an interactive chat session directly from the command line:
ollama run gpt-oss:20bOllama loads the model into memory and drops you into a prompt. Try asking it something:
>>> What is the capital of France and why is it historically significant?The model streams its response token-by-token directly in the terminal. Type /bye or press Ctrl+D to exit the session.
Chatting from the Desktop App
Ollama also ships with a desktop application that provides a clean chat interface for interacting with your models.
Open Ollama from the Start menu or click the Ollama icon in the system tray and select Open Ollama.
Once the app is open:
- Click New Chat in the sidebar.
- Select gpt-oss:20b from the model dropdown in the bottom-right corner of the chat input area.
- Type a message and press Enter to start chatting.
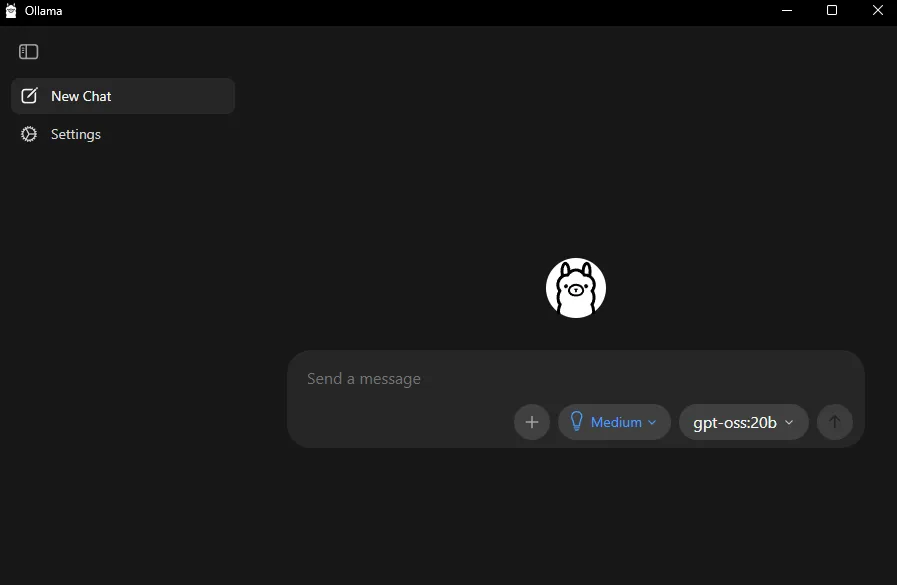
The desktop app keeps a history of your conversations in the sidebar, making it easy to revisit previous chats.
Using the REST API
After installation, Ollama runs as a background service and exposes a REST API on http://localhost:11434 that you can use to integrate models into your own applications and scripts.
Generate a Response in Terminal
curl http://localhost:11434/api/generate -d '{"model": "gpt-oss:20b", "prompt": "Explain GPU acceleration in two sentences.", "stream": false}'curl.exe http://localhost:11434/api/generate -d '{"model": "gpt-oss:20b", "prompt": "Explain GPU acceleration in two sentences.", "stream": false}'The response is a JSON object containing the model’s output in the response field.
Python Example
Now that we can hit the Ollama API programmatically, let’s call it from Python.
Create a Virtual Environment in Terminal
sudo apt install -y python3-venvpython3 -m venv ollama-envsource ollama-env/bin/activatepip install requestspython -m venv ollama-envollama-env\Scripts\activatepip install requestsCreate a Python file
In the same directory, use VS Code or another editor to create a .py file and copy the following code into it. Then, run the file in your activated environment with python your_file_name.py
import requests
response = requests.post(    "http://localhost:11434/api/generate",    json={        "model": "gpt-oss:20b",        "prompt": "Write a haiku about local AI inference.",        "stream": False,    },)
print(response.json()["response"])
Key API Endpoints
| Endpoint | Method | Purpose |
|---|---|---|
/api/generate | POST | Single-turn text generation |
/api/chat | POST | Multi-turn conversation with message history |
/api/tags | GET | List available models |
/api/show | POST | Show model details |
/api/pull | POST | Pull a model from the registry |
For the full API reference, see the Ollama API documentation.
Next Steps
- Try different models: Browse the Ollama model library to explore hundreds of available models, from small coding assistants to large reasoning models.
- Create custom models: Use a Modelfile to set custom system prompts, temperature, and other parameters for a tailored experience.
- Build with the API: Use the Python or JavaScript client libraries to integrate Ollama into your applications.
- Connect to frontends: Pair Ollama with tools like Open WebUI for a feature-rich chat interface with search, personas, and document upload.
For more information, check out the Ollama documentation.
Need help with this playbook?
Run into an issue or have a question? Open a GitHub issue and our team will take a look.